Getting started with Gradle
It’s been a long time since gradle become so popular framework.Year ago I tried to build one project using gradle with my coworkers, but as for me, I didn’t understand all the upsides and downsides of this framework. So, today I dedicated one day for investigating this framework and I would like to make some review of it.
The author of this beatiful framework is Hans Dockter
Gradle is a dynamic build tool. That’s mean, that you can use this build tool not only for java, but for any language, that can provide plugin for itselft.
Gradle is a live project. I mean, Gradle is one of the biggest open source projects in the world, there is 1.5 million builds using gradle every day.
##Agenda
- Gradle setup
- Short introduction to Gradle Build
- Single Module Project setup
####Gradle setup
If we are using Windows or Linux or OS X, we can install Gradle by following steps:
- Download the binaries from the downloads page.
- Unpack the zip file and add the GRADLE_HOME/bin directory to the PATH environment variable.
On linux or OS X, just do following:
- Open your terminal
- Type
nano .bashrc
And modify this file as in example below
- Then restart your terminal
- If there is no suspicious messages in your terminal after restart, then you can proceed with installiation.
We can verify that Gradle is working properly by running the command gradle -v at command prompt. If Gradle is working properly, we should the following output (Windows and Linux users will naturally see a bit different output):
gradle -v
Gradle 2.3 ————————————————————
Build time: 2015-02-16 05:09:33 UTC Build number: none Revision: 586be72bf6e3df1ee7676d1f2a3afd9157341274
Groovy: 2.3.9 Ant: Apache Ant(TM) version 1.9.3 compiled on December 23 2013 JVM: 1.8.0 (Oracle Corporation 25.0-b70) OS: Mac OS X 10.10.3 x86_64
####A Short Introduction to Gradle Build
Gradle has two basic concepts: projects and tasks. These concepts are explained in the following:
- A project is either something we build (e.g. a jar file) or do (deploy our application to production environment). A project consists of one or more tasks.
- A task is an atomic unit work which is performed our build (e.g. compiling our project or running tests). So, how are these concepts related to a Gradle build? Well, every Gradle build contains one or more projects.
The relationships between these concepts are illustrated in the following figure:

We can configure our Gradle build by using the following configuration files:
- The Gradle build script (build.gradle) specifies a project and its tasks.
- The Gradle properties file (gradle.properties) is used to configure the properties of the build.
- The Gradle Settings file (gradle.settings) is optional in a build which has only one project. If our Gradle build has more than one projects, it is mandatory because it describes which projects participate to our build. Every multi-project build must have a settings file in the root project of the project hierarchy.
Single Module Project setup
I came from Maven world, so it’s obvious for me how to develop java project using maven build tool.But I am a new man in Gradle world.Hence, I will start from describing simple single module application, and then I will enhance our project to multi module app.
So, first thing you need to do it to create your folder
cd ~/{your_workspace}
mkdir gradle-getting-started
On this step I assume that you’ve already installed Gradle and are ready to create projects.
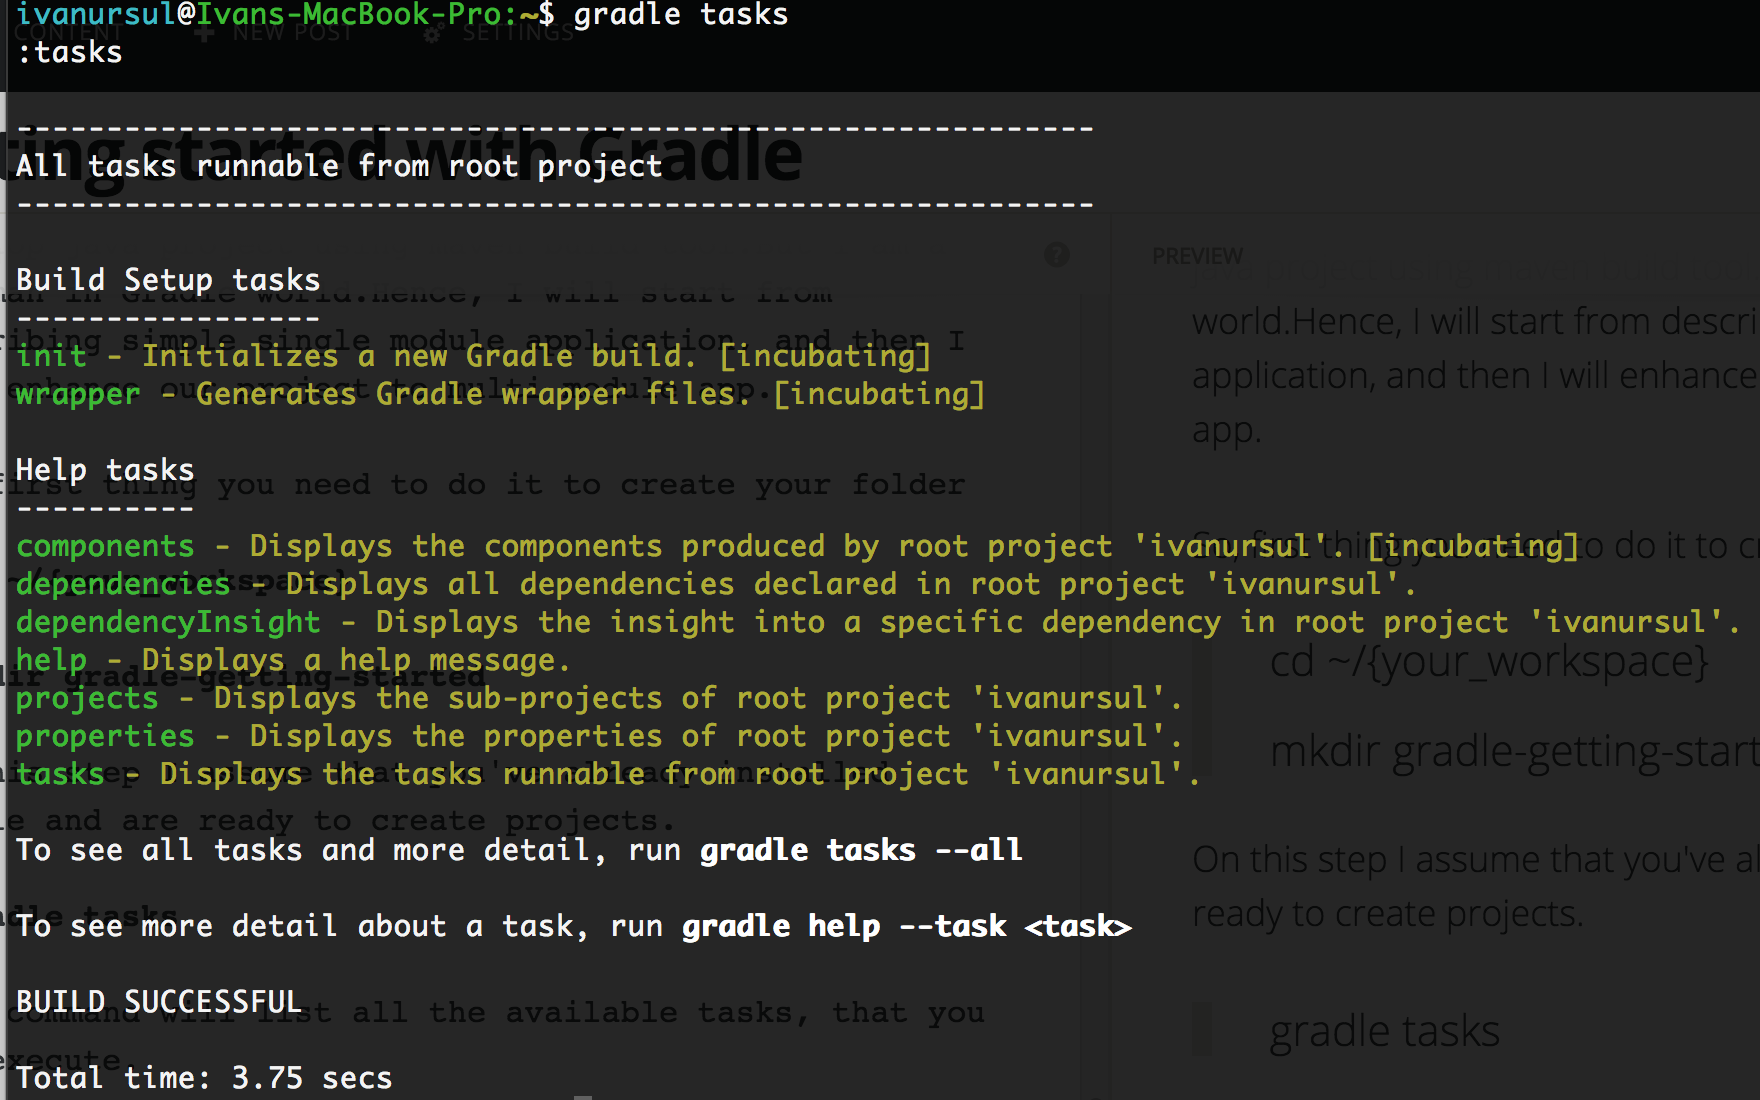
gradle tasks
This command will list all the available tasks, that you can execute.
By this time you will be able to run only two tasks

- init
- wrapper
PS - By executing gradle init, Gradle also generates wrapper.
So, execute comamnd below
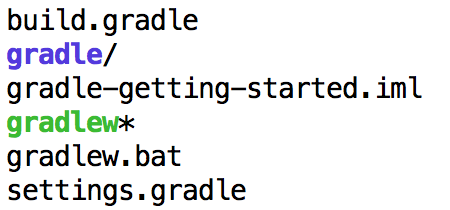
gradle init
This command should generate such files:

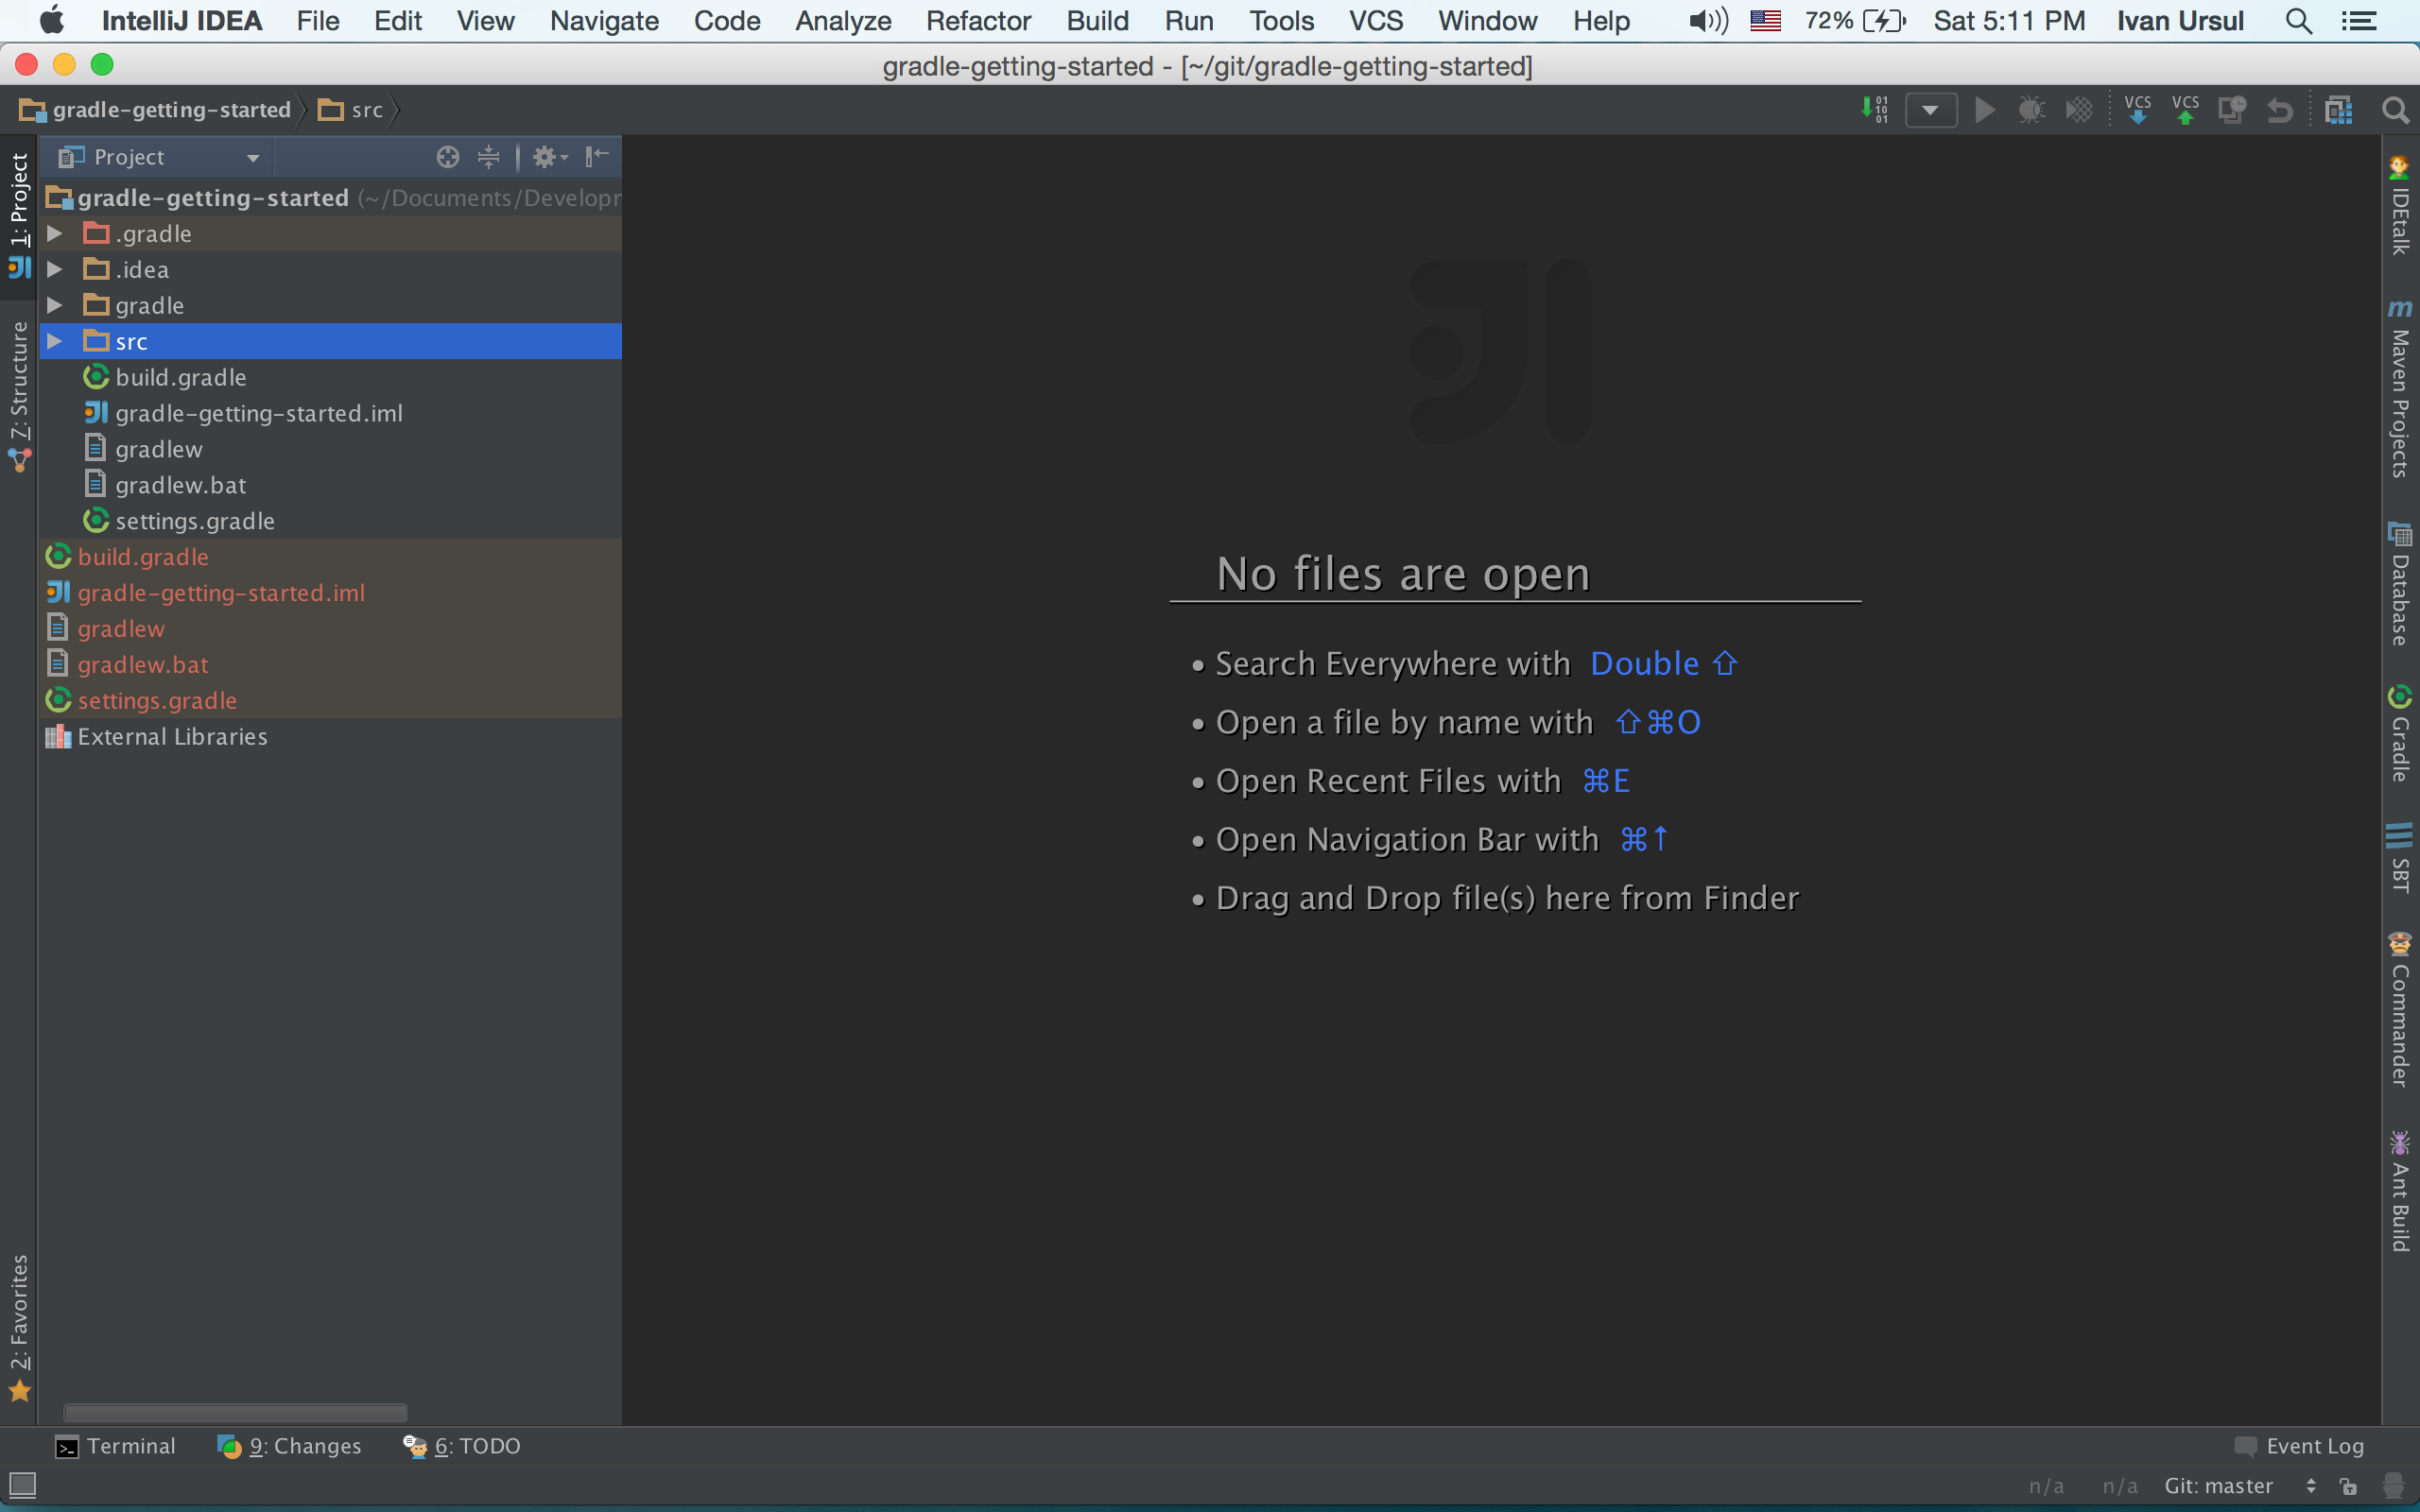
After you create this files, open your favotire IDE(I use InteliJ IDEA) and import this folder as Gradle project.In my case it looks like this

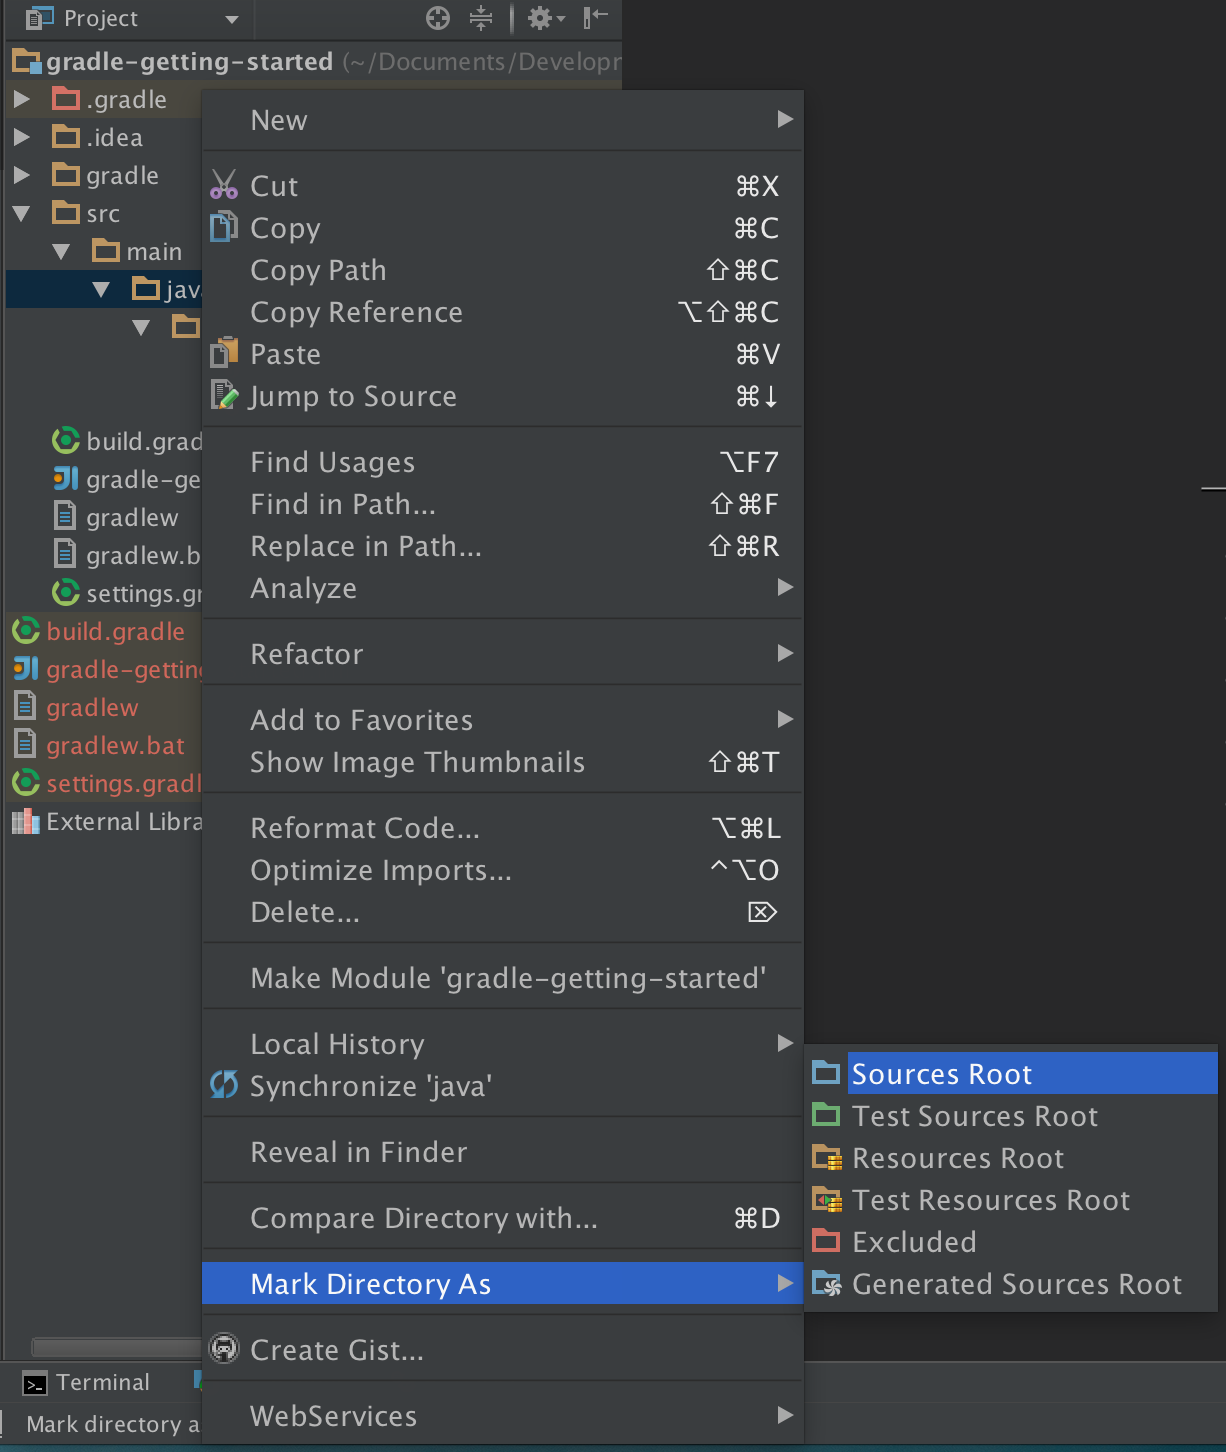
Next thing you need to do it to create src/main/java folder. Just hit Ctrl+Insert and create this directories.After that mark java folder as source folder.

Now, edit your build.gradle file - remove all comments from it and add single line
apply plugin: ‘java’
This plugin allows to use all the capabillities of java inside your project.Now you know how easily you can import other languages inside your gradle.For instance, you can import c language.You can find more detailed information about language plugins here.
apply plugin: ‘c’
###Looks great, isn’t it ?:)

Now it’s time to create some classes.Spring recommends that you create two classes: HelloWorld.java and Greeter.java.
After just run
gradle build
To see the results of the build effort, take a look in the build folder. Therein you’ll find several directories, including these three notable folders:
- classes. The project’s compiled .class files. reports.
- reports produced by the build (such as test reports).
- libs. Assembled project libraries (usually JAR and/or WAR files).
The classes folder has .class files that are generated from compiling the Java code. Specifically, you should find HelloWorld.class and Greeter.class.
At this point, the project doesn’t have any library dependencies, so there’s nothing in the dependency_cache folder.
The reports folder should contain a report of running unit tests on the project. Because the project doesn’t yet have any unit tests, that report will be uninteresting.
The libs folder should contain a JAR file that is named after the project’s folder. Further down, you’ll see how you can specify the name of the JAR and its version.
#####Adding external dependencies to our application
Before I start I would like to emphasize on importance of manual loading dependencies into Gradle app from IDEA. I spent some extra minutes in finding out why my deps are not loaded as extra jars.Finally, I realized that there needs to be some Gradle window in IDEA. I recommend to read this doc article for resolving this issue
So, we would like to include Joda Time library into our project.Naturally, we need to find it somewhere.I am using Maven repository for that http://mvnrepository.com/artifact/joda-time/joda-time/2.8
Just transform your build.gradle file into something like this


